Planning a coastal sunset properly
The scenario. It is Tuesday. You have Saturday and Sunday free, four coastal locations saved, and no idea which is worth the drive. This is how to answer that in five minutes rather than by checking four apps and guessing.
1. Ask the app rather than the four apps
Planning → Optimal Windows → Compute
It takes the locations you have saved and scores every shooting window over the next ten days — sunrise, sunset, golden hour, blue hour, moonrise, and any low tides — on light quality, the forecast for that hour, the state of the tide, and whether anything is seasonally active.
What comes back is ranked, best first: a place, a date, a window, a score.
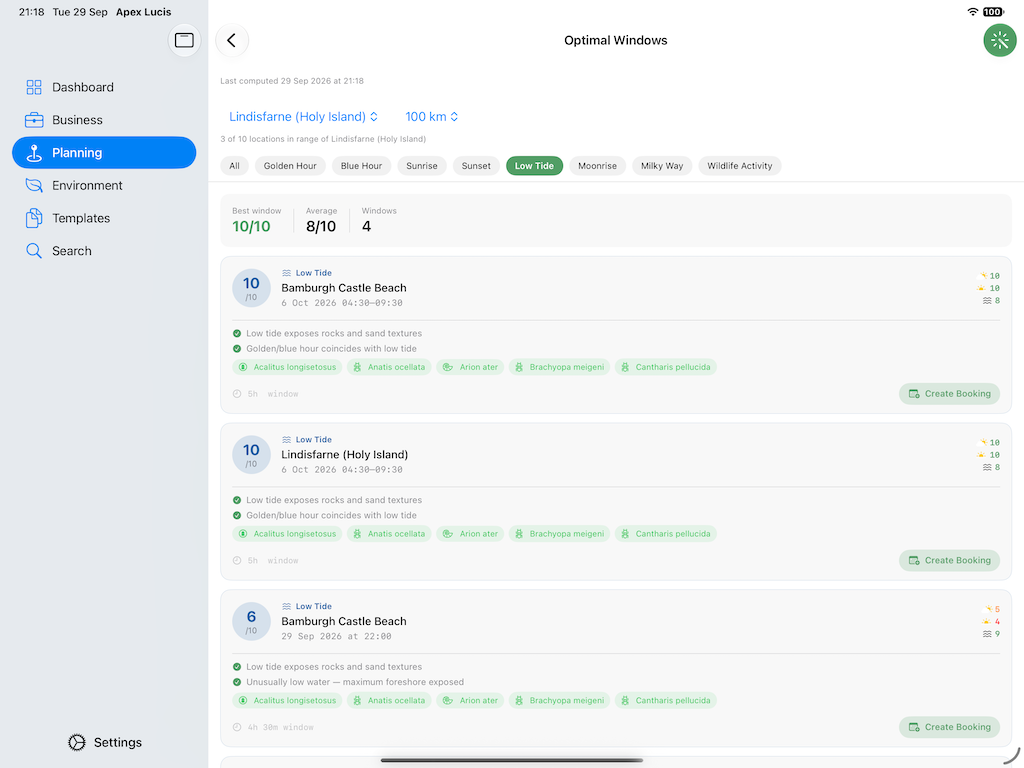
Read down rather than just at the top. The best result is often a location you go to anyway; the interesting one is usually third or fourth — a quiet weekday at somewhere you had half-forgotten.
Free scans cover three locations over three days. Pro scans every location you have saved, ten days out.
2. Check the tide is doing what you need
Environment → Tides, or open the location
Suppose the scan surfaced Saturday, blue hour, at a rocky beach. Before committing, check what the tide is doing across that window rather than at one instant.
The question is not simply “is it low” — it is whether the state suits what the place needs. Low water for foreground texture and pools; high water if the picture is about the sea reaching the subject. And the hour either side of low is usually better than slack low, because the water is still moving through the foreground.
Also check whether it is a spring or a neap. A location that only works on a big low is ordinary the rest of the month.
3. Check the light lines up with it
Environment → Light & Sky
Blue hour is a span, not a moment, and its length depends on your latitude and the date. Look at where sunset happens on the horizon too — the sun moves a long way through the year, and a location that works in October can be lit from the wrong side in June.
4. Read the forecast the right way
Environment → Weather
Look at cloud cover at the hour you will be shooting, not for the day. Broken cloud with a clear strip at the horizon is what produces colour; clear skies and solid overcast are both flat.
Then check wind direction. Onshore means spray on the front element every thirty seconds; offshore on the same beach is a pleasant evening.
The Shoot Score on the location combines all of this into one figure out of ten, which is the quick version — but the components tell you what is wrong when it is low, which is usually one fixable thing.
5. Commit
From the Optimal Windows result → Create Booking
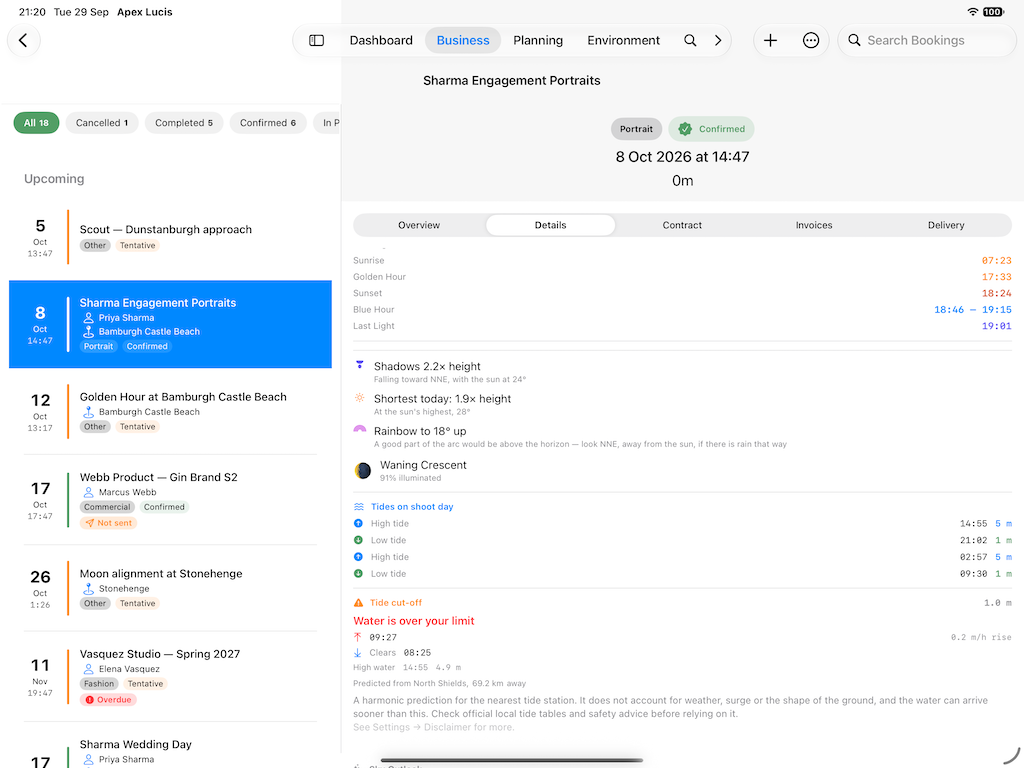
It becomes a booking carrying the tide and light times for that date at that place. Add your gear kit so packing is a checklist rather than a memory exercise.
If the location has a safe height set, you will be warned about the cut-off rather than having to work it out on the beach in the dark.
6. On the day
Open the booking in the car. Parking notes, the walk time, the light times and the tide rows are all there — worked out on the device, so a headland with no signal makes no difference.
What this relies on
Locations, set up properly. The scan can only rank what you have saved, and the tide only appears if the location type is coastal. Ten minutes adding locations properly is what makes this whole workflow work.
The scan stops at ten days, because that is as far as the forecast reaches. Anything beyond that would be a ranking of invented weather.
Modules used
| Module | Guide |
|---|---|
| Optimal Windows | Optimal Windows |
| Locations | Location Scout |
| Tides | Tides |
| Light & Sky | Light & Sky |
| Weather | Weather |
| Shoot Score | Shoot Score |
| Gear | Gear Manager |
| Bookings | Bookings |