Moon Alignment
Overview
Moon Alignment solves one of landscape photography’s most complex planning problems: working out the exact date, time, and camera position needed to photograph the moon rising or setting behind a specific subject, framed at a specific size in the image.
Pro Required: Moon Alignment needs an active Apex Lucis Pro subscription. Without it, the Moon Alignment card still appears on the Planning screen, and opening it shows the upgrade screen.
This feature uses Apex Lucis’s built-in ephemeris engine to calculate the moon’s position in the sky — no internet required.
Accessing Moon Alignment
Planning tab → Moon Alignment
Step 1 — Place Pins
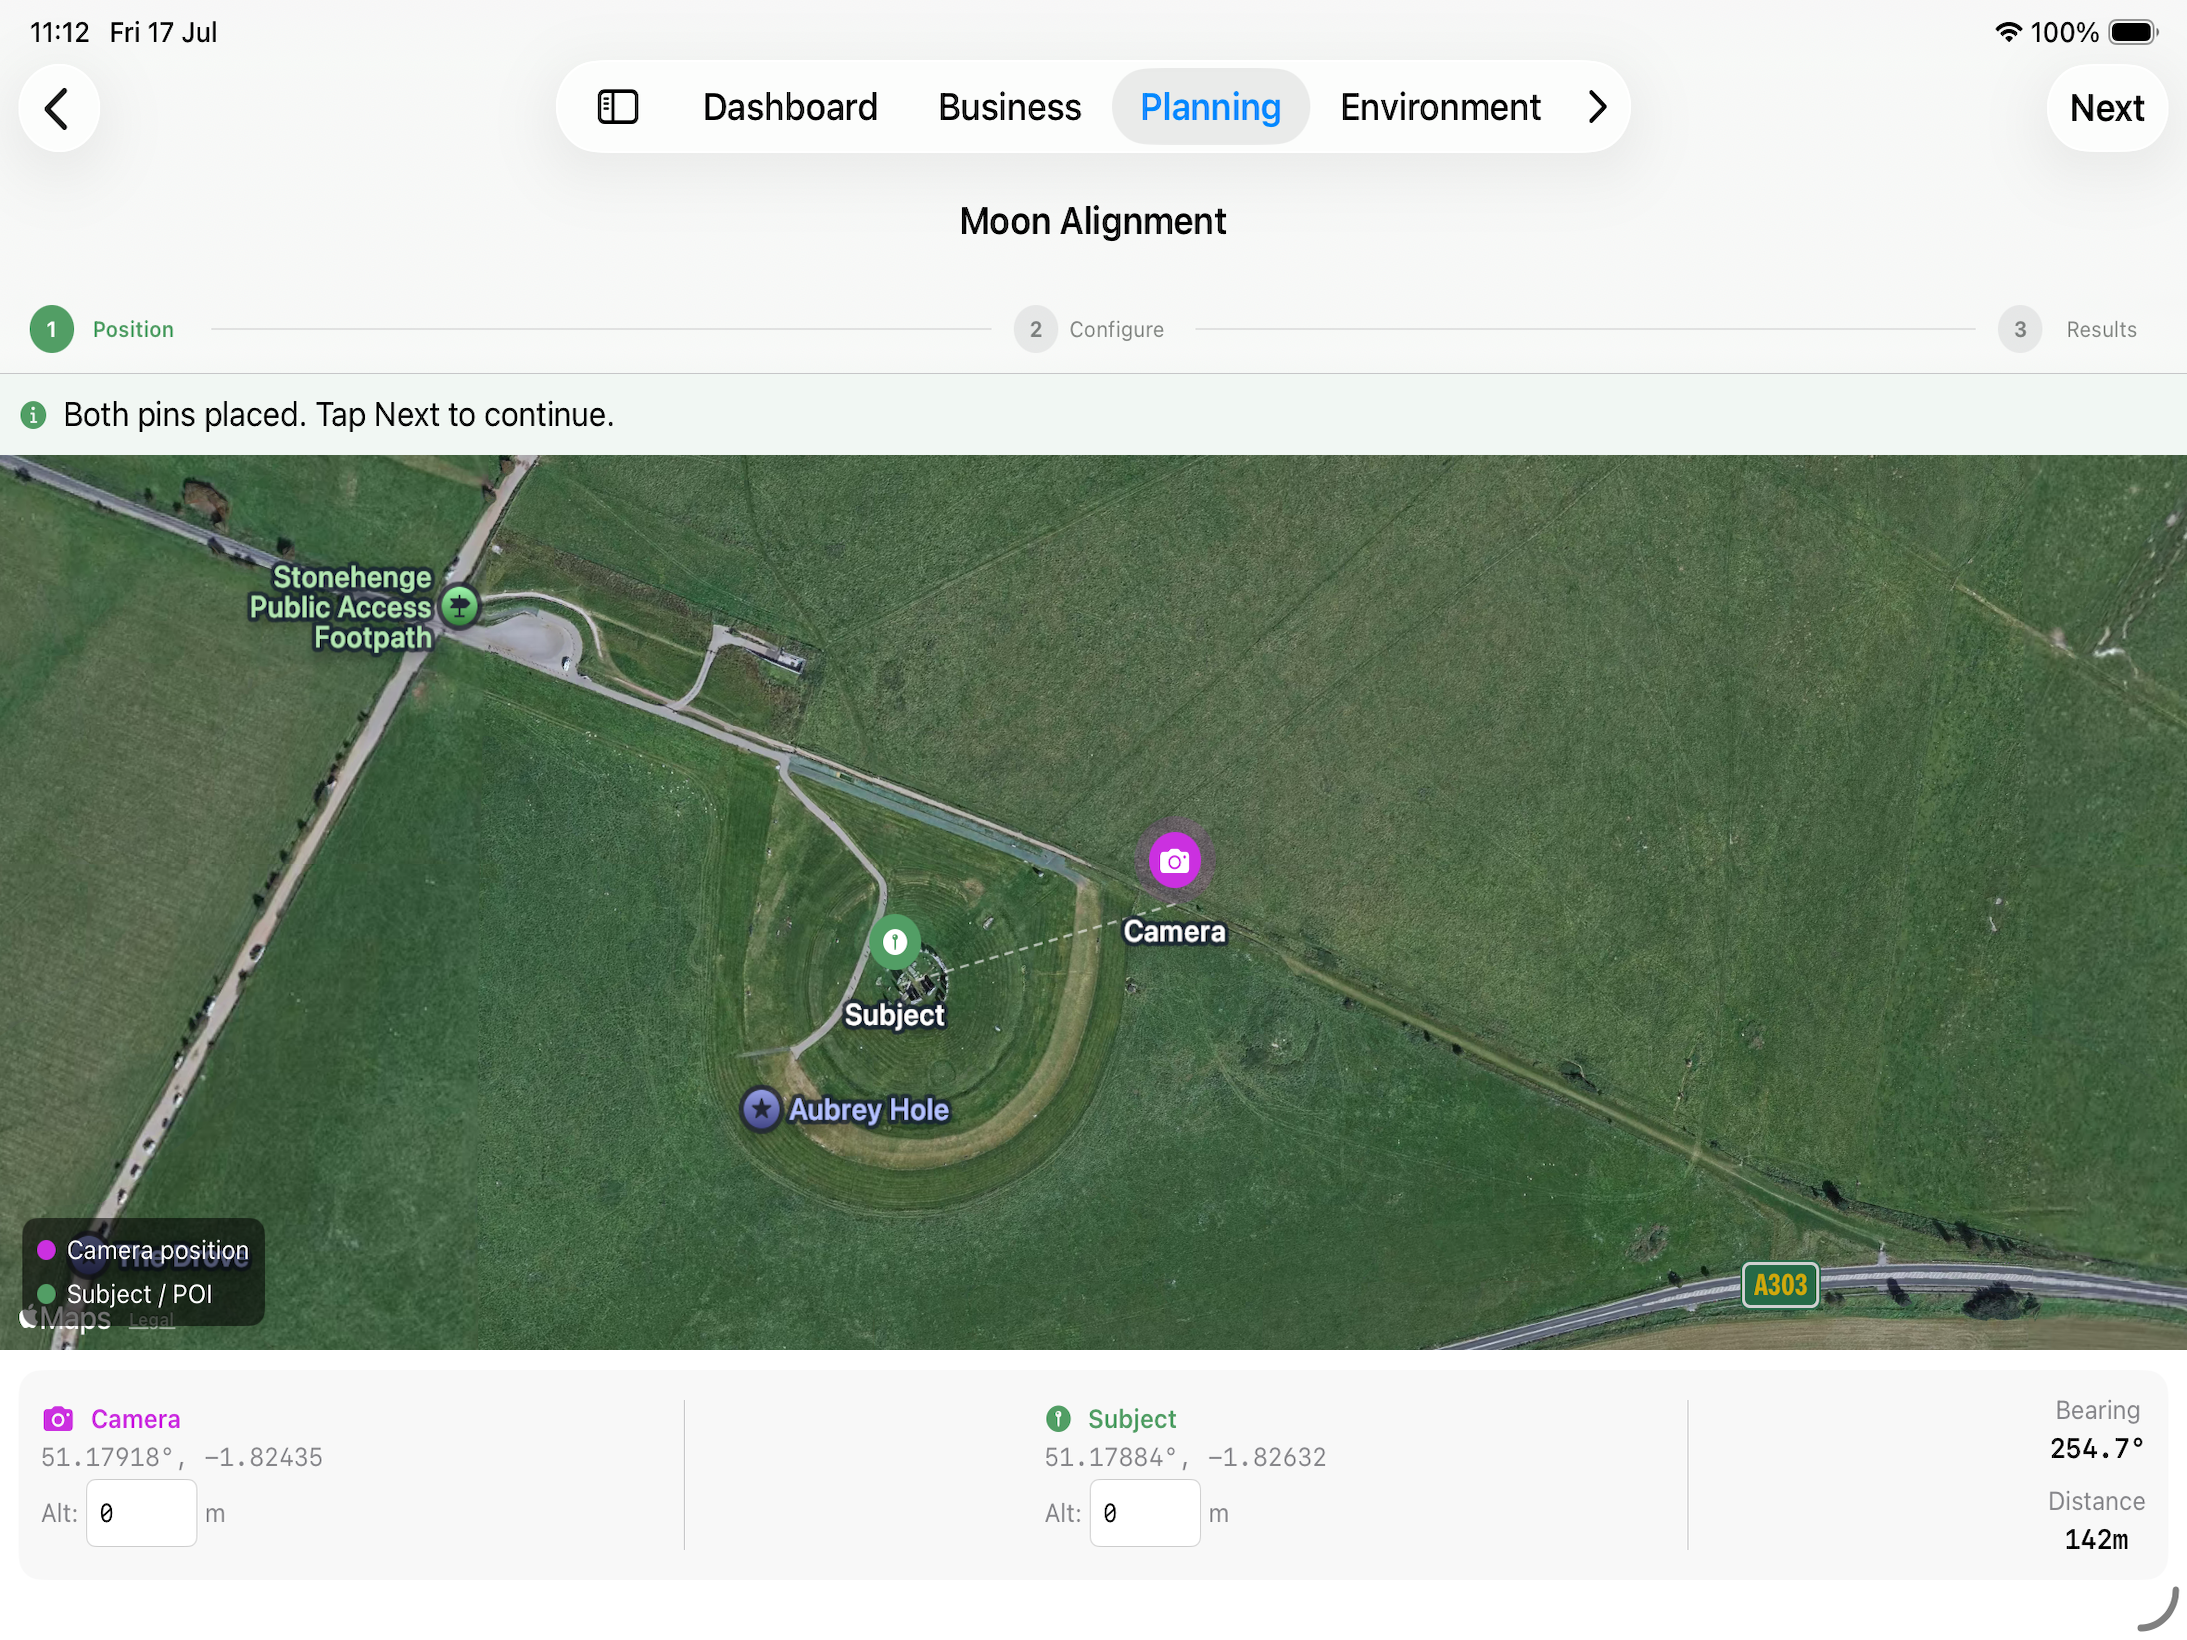
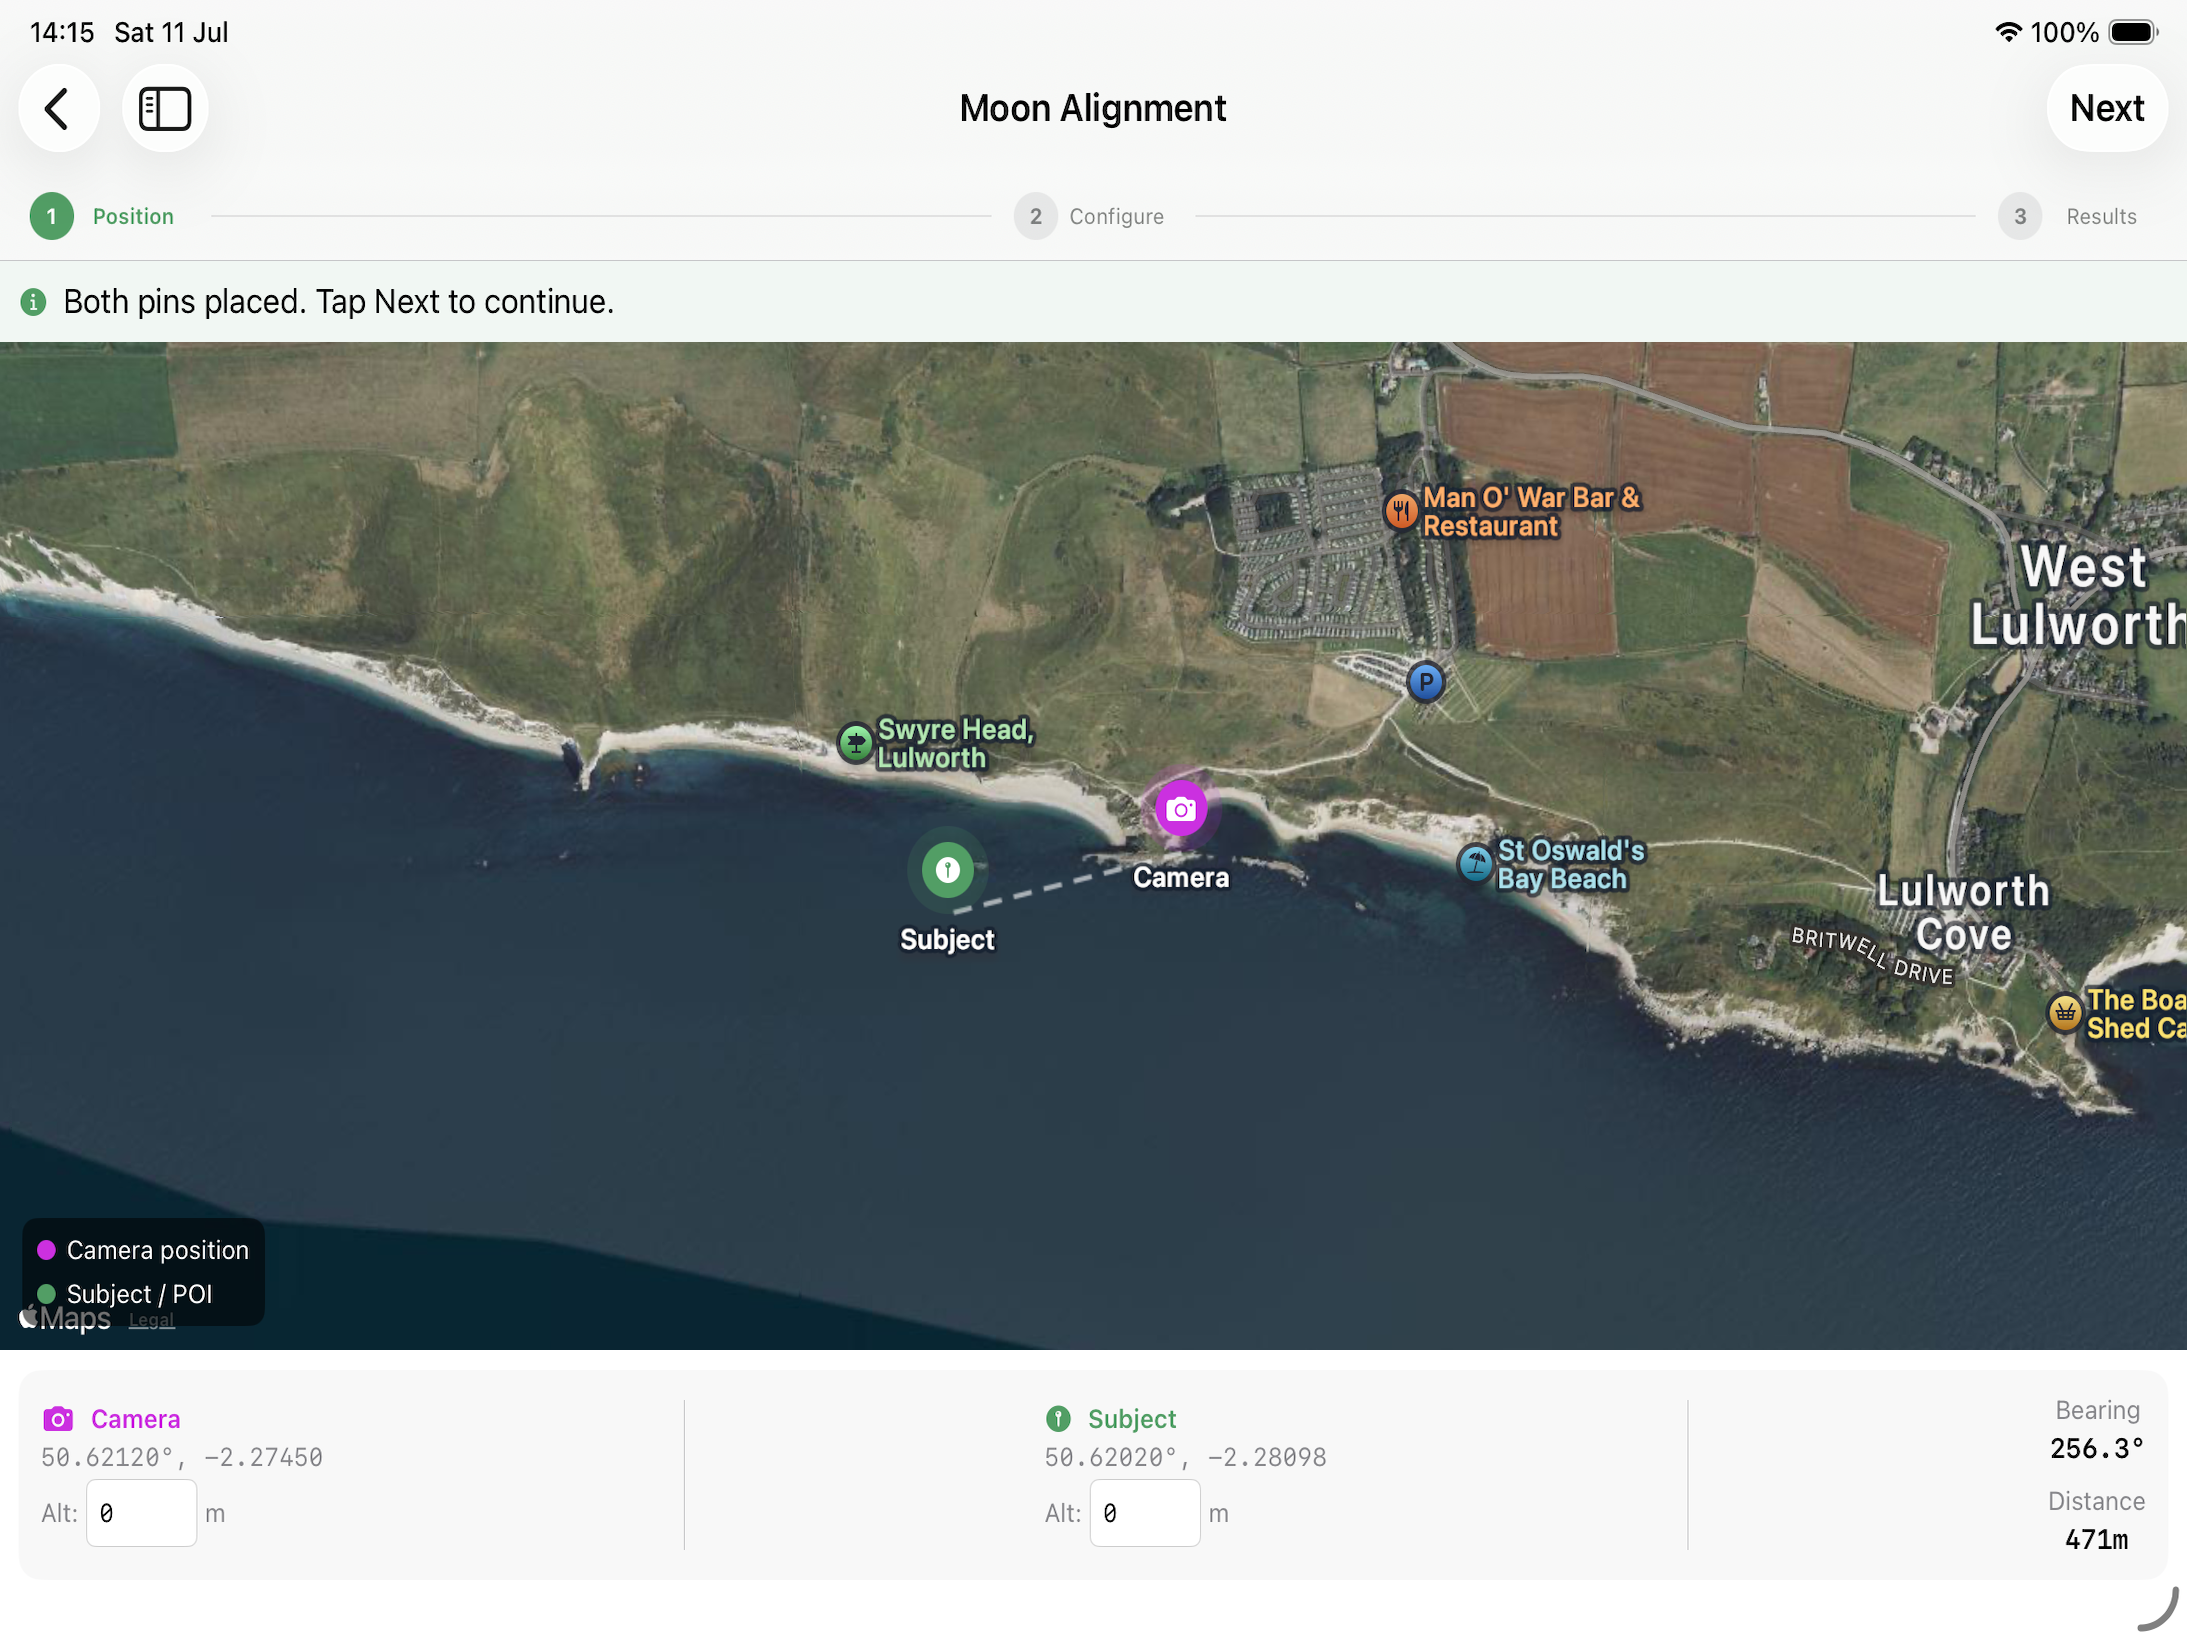
A map appears with two pins:
- Camera Pin (Purple) — Your shooting position. Will default to the coords of a Location, or your current location.
- Subject Pin (green) — What you are photographing (the building, rock, tree, etc.)
Drag the pins to their positions. The bearing from camera to subject is calculated automatically.
Step 2 — Fine-Tune Configuration
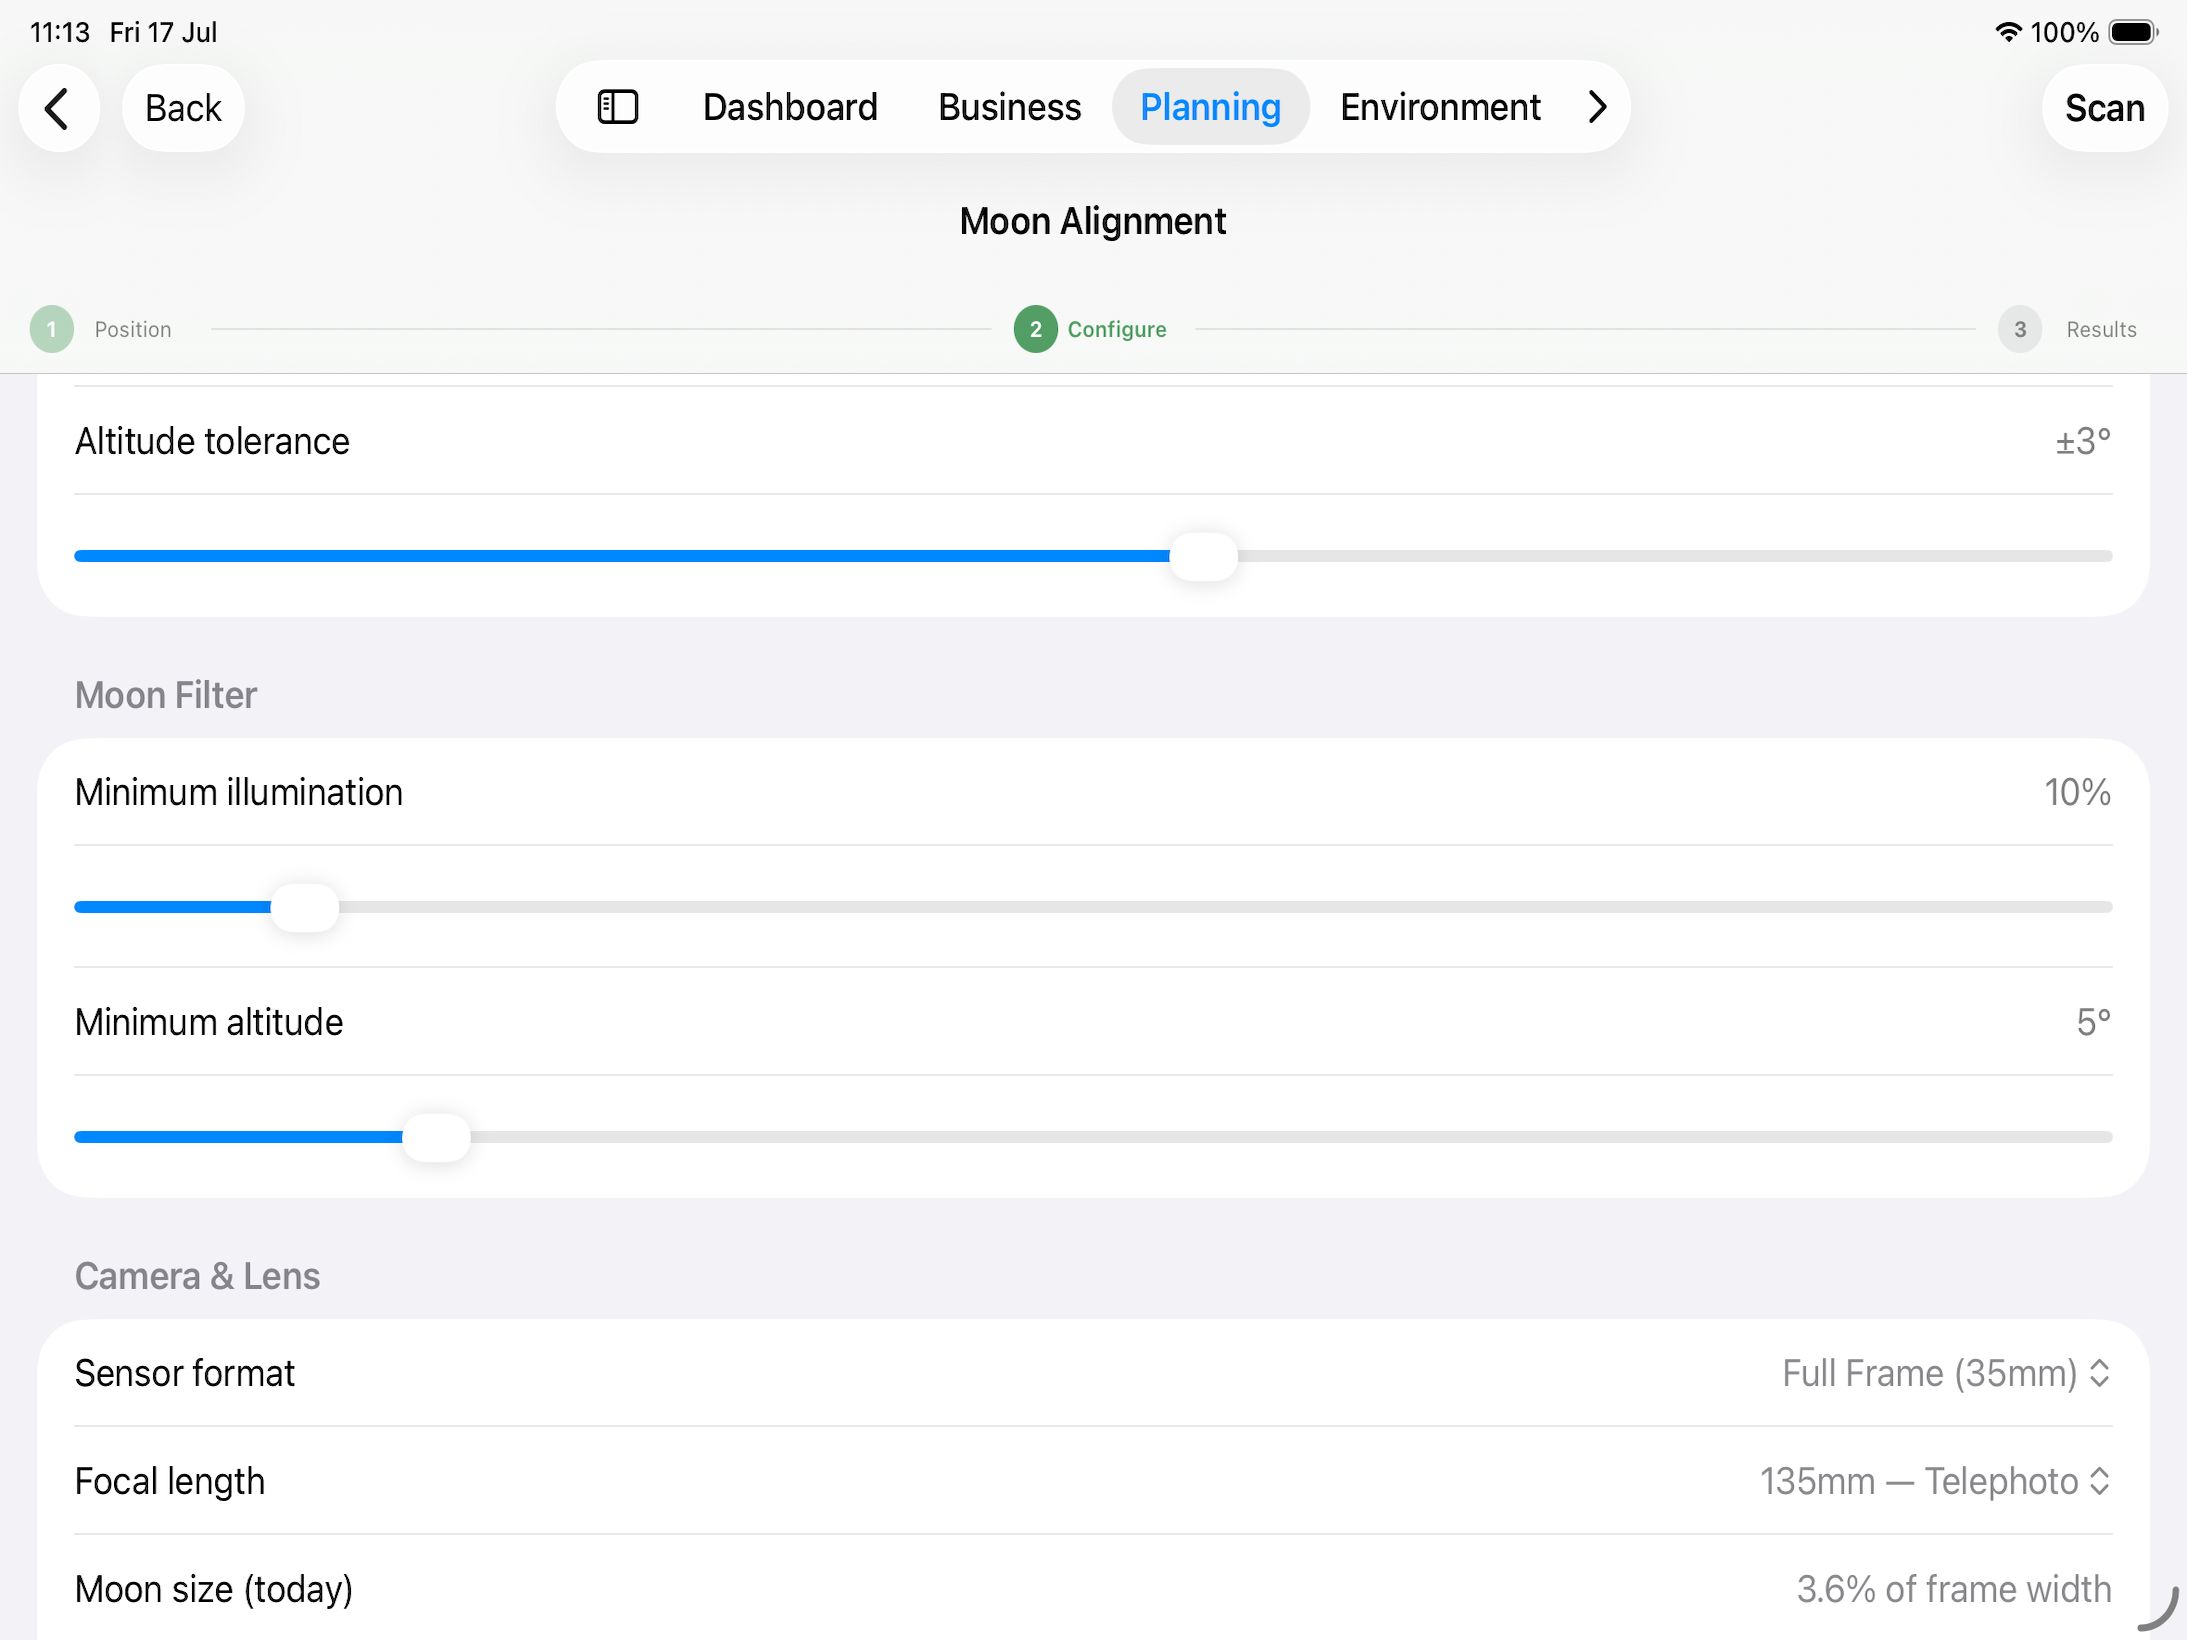
On the second step you can
- Adjust the date range to be scanned to find the best results
- Change the Tolerances for the Moon’s Azimuth and Altitude
- Set the Max moon illumination
- What your ideal altitude of the moon would be
- The size of your Camera Sensor, focal length of Lens you are planning on using.
Step 3 — Results
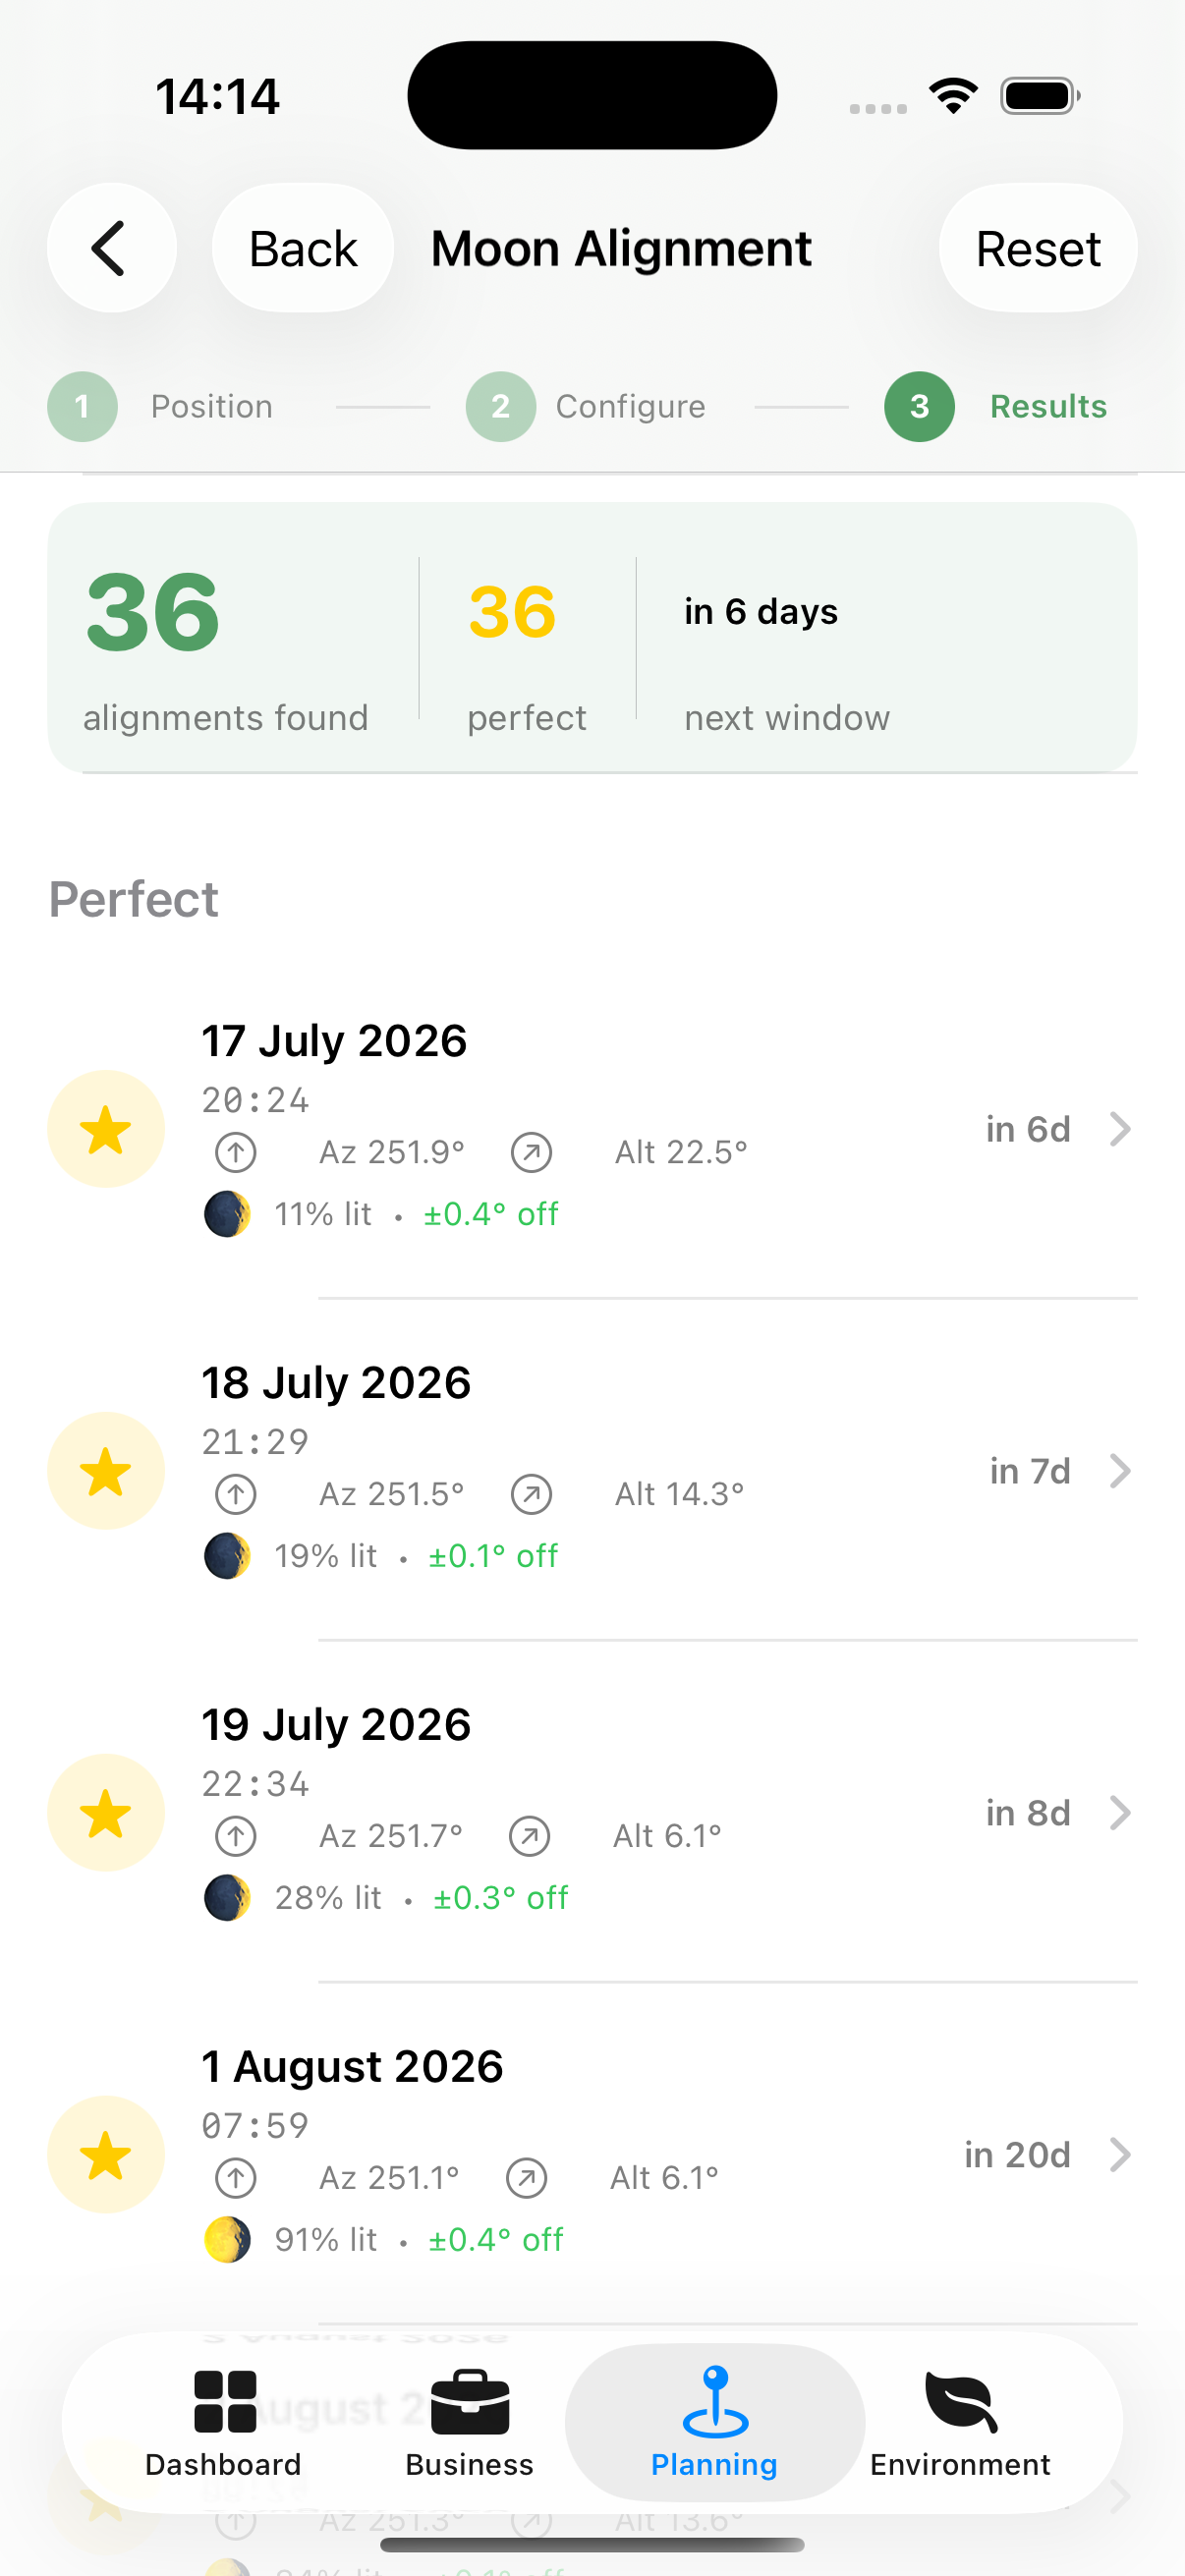
Apex Lucis shows all time windows during the selected period when the moon will be aligned with your camera-to-subject bearing, including:
- Date and time of alignment
- Moon altitude at that moment (higher = moon appears higher in sky)
- Moon illumination percentage
- Moon phase name
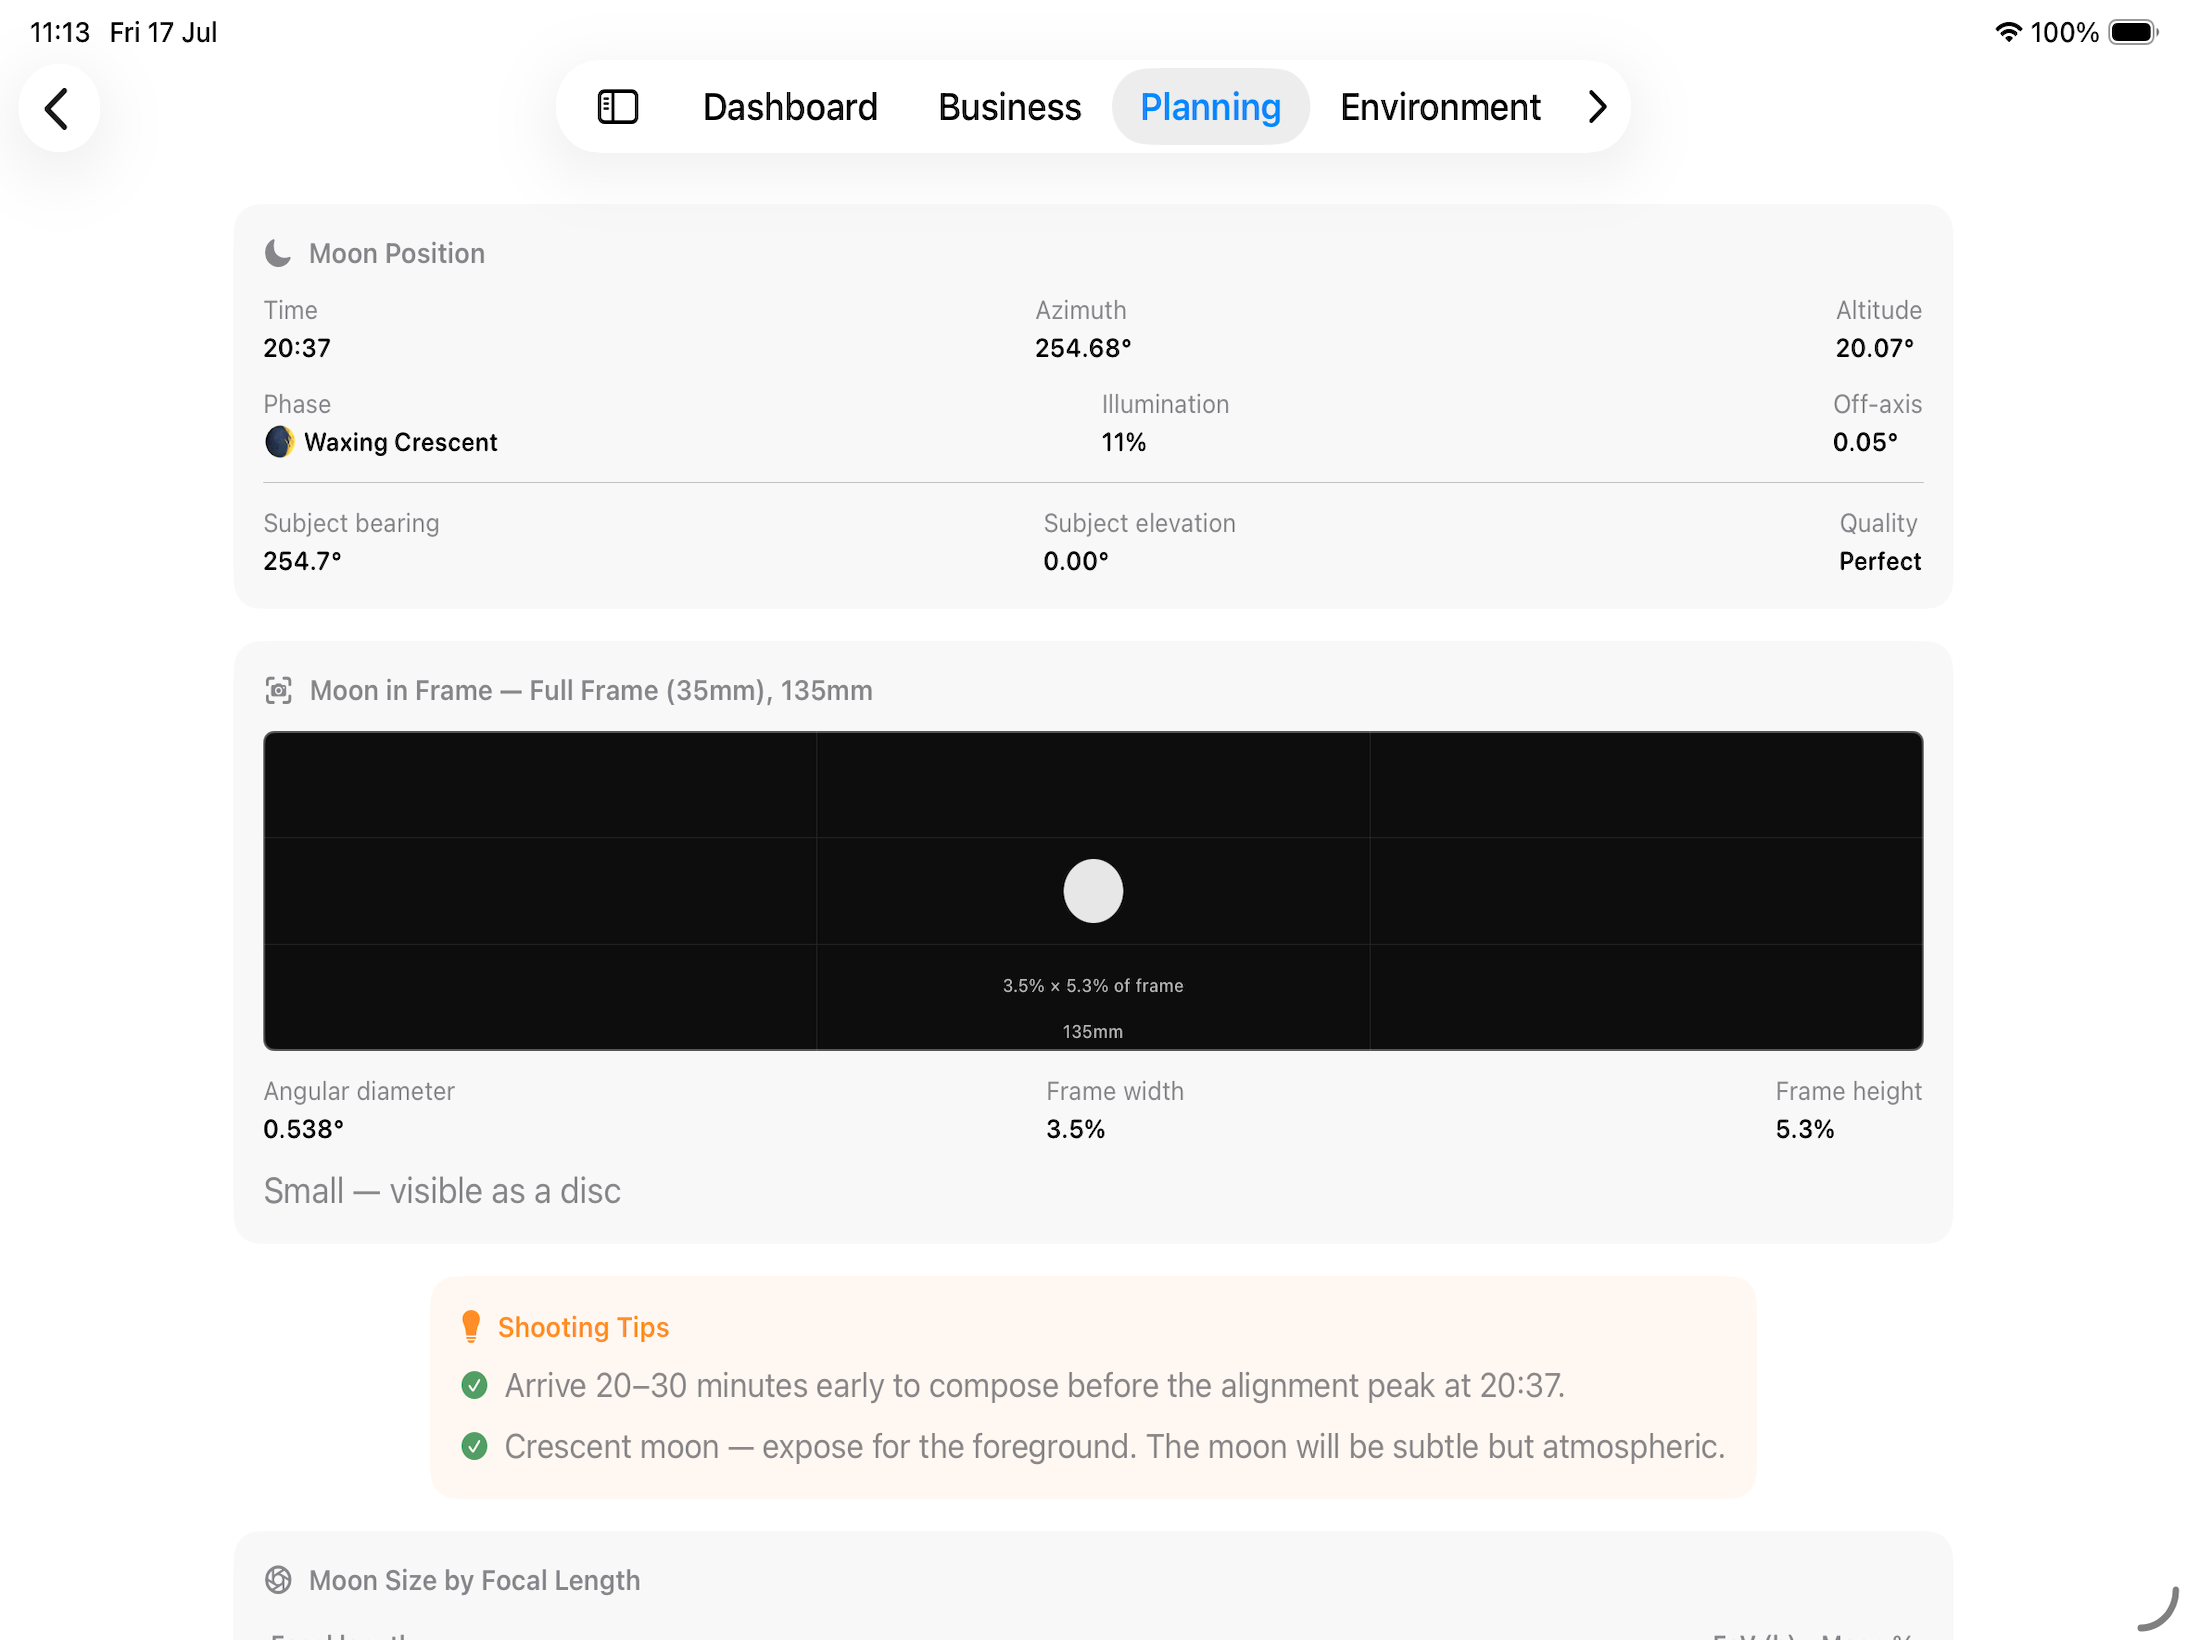
Alignment Detail View Tap any result to see:
- The detail of the moon for that result
- An estimate of how big the moon would look through the view finder.
- Shooting Tips
Will Both Be Sharp?
The alignment knows the distance between your two pins, and the moon is far enough away to count as infinity — so once you pick an Aperture, Apex Lucis can tell you whether one focus setting holds both the landmark and the moon. It answers in one of three ways:
- Focus on the subject. It is beyond the hyperfocal distance, so the moon stays sharp behind it.
- Focus at the hyperfocal distance instead — not on the subject. Focusing on the subject itself would soften the moon. The card gives the distance and what it holds.
- No single focus holds both at that aperture. Stop down, use a shorter lens, or stand further back.
The card names the distance to your subject, the hyperfocal distance for the lens and aperture, and how much of the frame the moon fills.
Tip: This is the case worth checking before you drive out. A 400mm frame with the moon behind a church tower two hundred metres away can be a shot no aperture will save, and it is far better to know that at home.
Turning a Result Into a Booking
At the bottom of the Alignment Detail View, Create Booking puts the shoot in your diary.
The booking opens ready to edit, with the date and time already set: half an hour either side of the alignment, so there is time to set up before the moon reaches the bearing. Nothing is saved until you tap Save, so change the title, add a client or move the times first if you want to.
The notes carry the working out — the moon’s azimuth and altitude, its phase and illumination, how far off the bearing it will be, and the camera position to five decimal places.
Tip: The camera coordinates are the part you cannot recover later. An alignment is calculated for one spot on the ground, and standing fifty metres away is a different photograph.
If you ran the alignment from a saved location, that location is attached to the booking. From a dropped pin there is nothing to attach, so the coordinates in the notes are what you navigate by.
Moon Frame Visualiser
Below the lens table, a visual representation shows how the moon will look in the frame for whichever lens is selected in the table above it — useful for deciding which lens to pack.
How to read it:
- The bordered rectangle represents your camera’s frame, gridded with rule-of-thirds lines.
- The white circle is the moon, drawn to scale as a percentage of the frame — a small dot means the moon will look tiny at that focal length, while a circle filling most of the frame means it will dominate the shot.
- The percentage and lens focal length are labelled beneath the moon, so you can compare lenses at a glance by tapping through rows in the table above.